
Classes in QuickBooks are one of the platform's most powerful, yet often overlooked, features. Think of them as a way to add another dimension to your financial reporting. Instead of just seeing what you spent money on, you can see why or for which part of the business you spent it.
What Are Classes in QuickBooks and Why Use Them
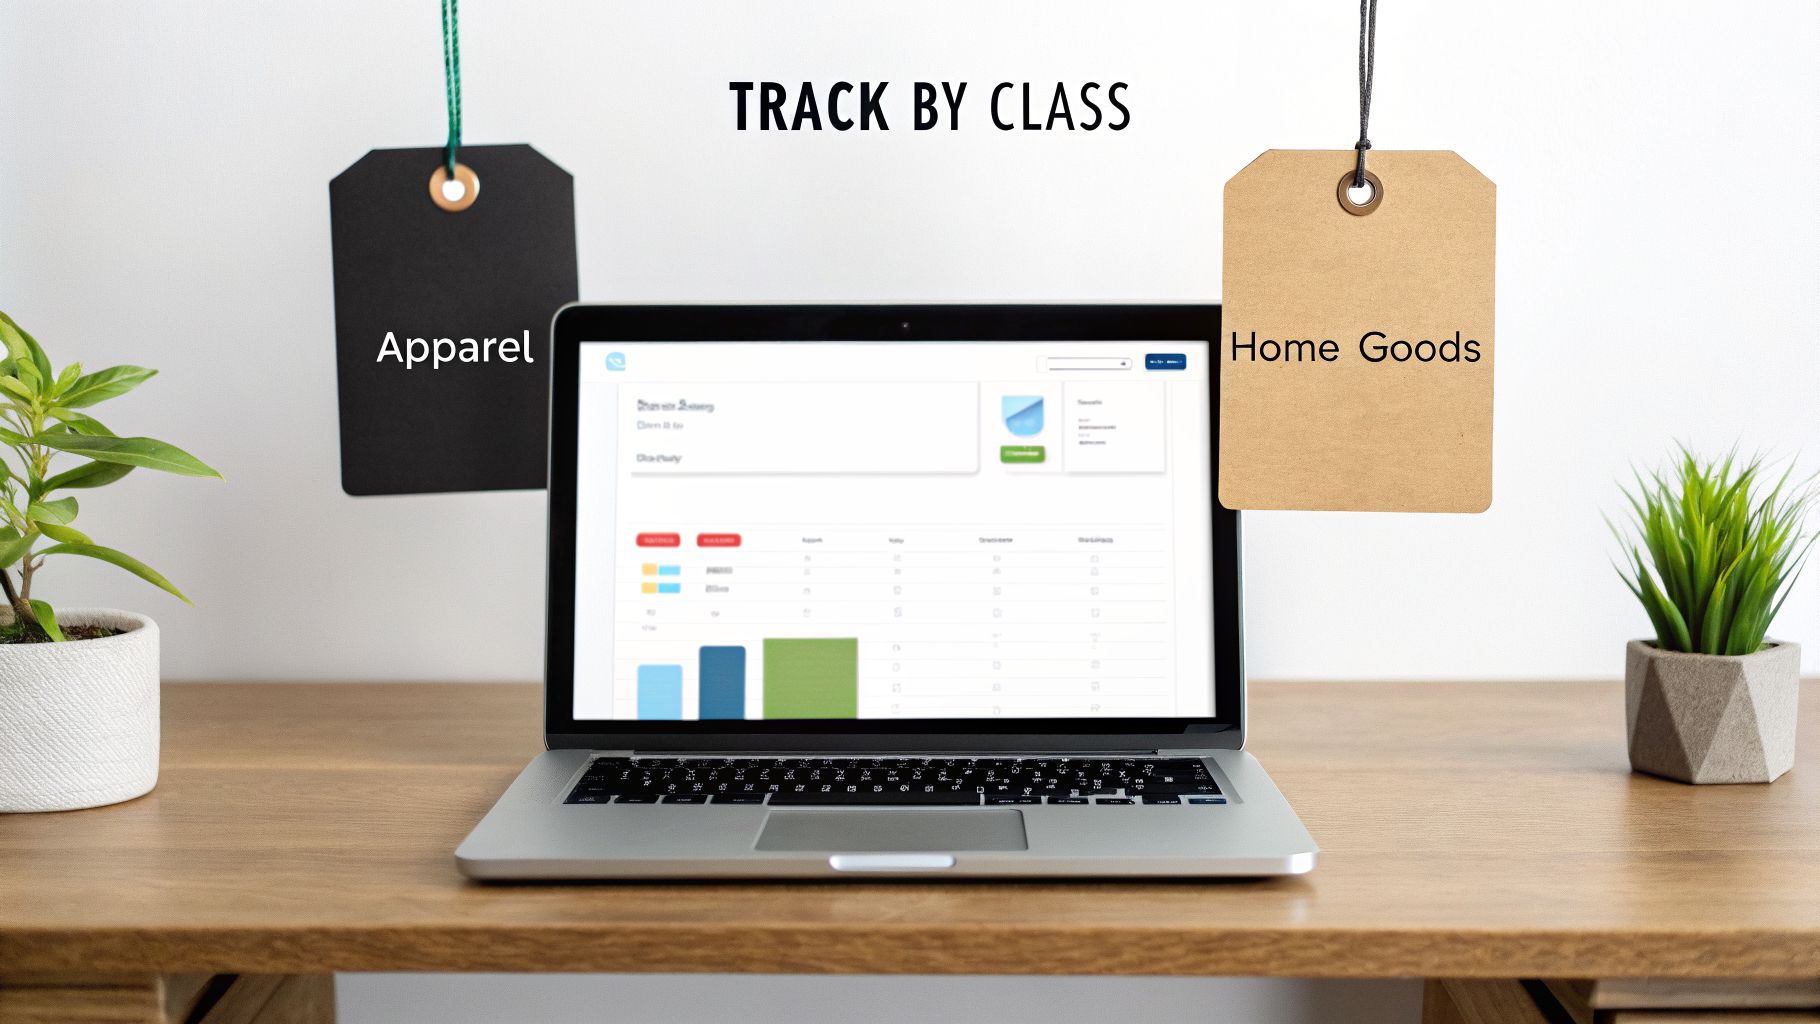
Let's say you run a retail shop that sells both apparel and home goods. You look at your profit and loss statement at the end of the month, and the bottom line looks okay. But you have a nagging question: where is that profit really coming from? Is your clothing line carrying the whole operation, or is the home goods section the surprise powerhouse? This is the exact kind of question that classes in QuickBooks were built to answer.
Unlocking Segmented Reporting
At its heart, class tracking is a flexible way to tag your transactions. It’s crucial to understand that classes are completely separate from your Chart of Accounts. Your Chart of Accounts lists what you spent money on (like rent, office supplies, or payroll). Classes, on the other hand, track the business segment that transaction belongs to, like the 'Apparel' department or the 'Home Goods' department.
Every time you enter a transaction—whether it’s an invoice for a sale or a bill for new inventory—you simply assign it to a class. That one extra step is what powers one of the most useful reports in the entire system: the Profit & Loss by Class report.
This report gives you a clean, side-by-side comparison of each segment’s performance. You can instantly spot which parts of your business are making money and which are falling behind, allowing you to make smarter decisions based on actual data.
The Power of Clarity Without Complexity
Without using classes, getting this kind of detailed insight is a real headache. You might be tempted to create entirely separate QuickBooks company files for each business division. That approach is not only incredibly time-consuming but also makes it nearly impossible to get a clear, consolidated picture of your company's overall financial health.
Class tracking is a far more elegant solution. It lets you manage everything within a single company file while still getting the granular detail you need. For business owners just dipping their toes into this kind of financial analysis, our guide to QuickBooks for beginners can help build a strong foundational understanding.
So, what are the real-world benefits of using classes?
- Deeper Financial Insight: Move beyond a single net income number and see the true profitability of each business segment.
- Improved Decision-Making: Pinpoint your most successful product lines, locations, or services so you know exactly where to invest your resources.
- Simplified Bookkeeping: Track multiple dimensions of your business without the nightmare of juggling separate sets of books.
- Targeted Performance Analysis: Easily identify underperforming areas that might need a strategic pivot, cost reductions, or a fresh approach.
By setting up class tracking, you stop treating your accounting as just a necessary chore and start using it as a strategic tool for growth. It’s the difference between guessing what’s working and knowing for sure.
How Classes Reveal Your Business's True Profit Centers
Knowing what classes are is one thing. But the real magic happens when you see how they turn your raw financial data into a genuine roadmap for growth. Using classes in QuickBooks is the leap from simply recording transactions to making smart, data-driven decisions. It’s the difference between flying blind and having a dashboard that shows you exactly what’s working in every corner of your business.
Think of it like this: your main Profit and Loss statement is the final score of a basketball game. It tells you whether you won or lost, but not how. Class tracking is like watching the game film. It shows you which players scored the most points, who had the most assists, and which plays just aren't working.
This detailed view allows you to pinpoint your true profit centers—the parts of your business that are actually making you the most money relative to their costs. Once you have this knowledge, you can stop guessing and start making informed choices that directly boost your bottom line.
Real-World Scenarios and Strategic Decisions
The power of class tracking really clicks when you see it in action. The insights you get aren't just interesting trivia; they're actionable and can lead to major improvements in how you run things. Let's walk through a few examples.
Take a marketing agency that offers several different services. Without classes, all they see is one big revenue number at the end of the month. But with classes, they can create a structure like this:
- Class 1: Web Design Services
- Class 2: PPC Management
- Class 3: SEO Consulting
By tagging every single invoice and expense to one of these classes, the agency owner can finally get answers to crucial questions. Is Web Design bringing in a lot of cash but also eating up huge subcontractor fees, making it less profitable than it seems? Is PPC Management a low-effort, high-margin goldmine that deserves more of the marketing budget?
This clarity opens the door to smarter decisions, like shifting ad spend to promote the most profitable service or rethinking the pricing on low-margin offerings.
By identifying your most profitable segments, you can focus your resources where they will have the greatest impact. This simple shift in focus can dramatically increase your overall profitability without requiring you to work harder—just smarter.
From Real Estate to Retail
The applications are practically endless and span countless industries. For a real estate investor managing a portfolio of properties, class tracking is a game-changer. Each property can be set up as its own class.
Example Property Portfolio
| Class Name | Property Type | Goal of Tracking |
|---|---|---|
| 123 Main St | Single-Family Rental | Track income, mortgage interest, repairs, and property taxes to see its individual cash flow. |
| 456 Oak Ave | Duplex | Monitor the profitability of a multi-unit property and provide clear reports to partners. |
| 789 Pine Ln | Commercial Space | Analyze the financial performance of a commercial lease separate from residential holdings. |
This kind of setup delivers a crystal-clear P&L for each property. An investor can instantly see if 123 Main St is a cash cow or if 456 Oak Ave is consistently bleeding money due to maintenance issues. This is exactly the information you need to decide on rent increases, schedule major repairs, or even sell an underperforming asset.
At the end of the day, using classes in QuickBooks helps you spot underperforming areas that need a little TLC, prove your business's health to potential investors with detailed reports, and confidently steer your company toward its most lucrative opportunities.
Step-by-Step Guide to Setting Up QuickBooks Classes
Flipping the switch on class tracking in QuickBooks is pretty straightforward, but the exact steps are a little different for QuickBooks Online versus QuickBooks Desktop. Don't think of it as some intimidating accounting procedure. It’s more like unlocking a powerful new feature in an app you already use—one that will show you exactly which parts of your business are actually making money.
This guide will walk you through the menus and settings for both versions, so you can get classes in QuickBooks up and running right away.
Enabling Classes in QuickBooks Online
For a lot of businesses today, QuickBooks Online is home base. Activating class tracking is a simple tweak you can make in your company settings in just a few minutes.
Here's how to do it:
Navigate to Settings: First, click the Gear icon in the top right corner of your dashboard. Look under the "Your Company" column and select Account and settings.
Access Advanced Settings: On the menu that appears on the left, click into the Advanced tab. This is where QuickBooks tucks away many of its more powerful customization options.
Turn On Class Tracking: Find the Categories section and click on it. You'll see an option for "Track classes"—just click the toggle to switch it on.
Here’s a quick visual of where you'll find that "Track classes" option in the Advanced settings.
As soon as you turn it on, a couple of other important options pop up. Pay close attention to these, as they are your key to keeping your data clean.
Crucial Tip: You’ll see an option that says "Warn me when a transaction isn’t assigned a class." You should absolutely enable this feature. Think of it as your safety net—it’s the single best way to prevent messy, incomplete data by making sure every transaction gets categorized.
You'll also need to decide how to assign classes: "One to entire transaction" or "One to each row in transaction." For most businesses, assigning one class per transaction is perfectly fine. But if you deal with complex invoices that mix items from different business segments, assigning a class to each row will give you that much more detailed insight.
Activating Classes in QuickBooks Desktop
If you're a QuickBooks Desktop user, the process is just as simple, but the menus are in a different spot. You'll find what you need in the Preferences window.
Just follow these steps to get class tracking enabled:
- Open Preferences: From the top menu bar, go to Edit and then choose Preferences from the dropdown.
- Select Accounting: A new window will pop up. In the list on the left, click on Accounting.
- Enable Classes: Now, click the Company Preferences tab at the top of the main window. You’ll see a checkbox labeled "Use class tracking for transactions." Just check that box, and you're good to go.
Just like in the online version, Desktop will offer a "Prompt to assign classes" checkbox. I can't recommend this enough. Turning this on helps build the muscle memory of assigning a class every single time, which is what makes your reports reliable later on. Our guide on how to properly set up QuickBooks covers more of these foundational settings that make a huge difference in your bookkeeping efficiency.
With class tracking now switched on in either QBO or Desktop, you're all set to create your class list. This simple setup is the first real step toward getting a much deeper, more meaningful look at your company's financial story.
Using Classes in Daily Bookkeeping and Reporting
Once you've switched on class tracking, you're ready to put it to work. This is where the magic really happens—where your daily bookkeeping shifts from simple data entry to a powerful source of business intelligence. Integrating classes in QuickBooks into your workflow is all about making one extra click on each transaction. That small, consistent step is what unlocks a whole new level of financial clarity down the road.

The moment you enable class tracking, you'll notice a new "Class" field popping up on your transaction forms. It will be there on invoices, sales receipts, bills, checks, and expense entries. The goal from here on out is to diligently assign the right class to every single income and expense item that flows through your books.
Assigning Classes to Transactions
Let's walk through an example. Imagine you run a small contracting business with two main divisions you've set up as classes: "Residential" and "Commercial."
Entering an Invoice: When you invoice a client for a kitchen remodel, you’ll simply select the "Residential" class from the dropdown menu. If you're billing for an office build-out, you'll choose "Commercial."
Recording a Bill: A bill arrives from your lumber supplier. If all the materials were for the office project, you assign the entire bill to the "Commercial" class. Easy.
Splitting an Expense: But what if that lumber delivery was for both residential and commercial jobs? No problem. On the bill entry screen, you can split the transaction by line item. You'd assign, say, $1,500 of the cost to "Residential" and the remaining $2,500 to "Commercial."
This daily habit is the bedrock of accurate class reporting. Of course, it's also crucial that these transactions are categorized correctly in your main accounts. You can get a great refresher by reading our guide on the Chart of Accounts in QuickBooks to make sure your foundation is solid.
The Payoff: The Profit and Loss by Class Report
After consistently tagging your transactions for a month or a quarter, it's time to reap the rewards. The star of the show is the Profit and Loss by Class report. This isn't just another financial statement; it's a strategic document that tells the story of each part of your business, side-by-side.
To see it, just head to your Reports center and search for "Profit and Loss by Class." QuickBooks will instantly generate a report with columns for each of your classes—in our scenario, "Residential" and "Commercial"—along with an "Unclassified" column and a "Total" column.
Pro Tip: That "Unclassified" column is your quality control check. A big number there means transactions are slipping through the cracks without a class assigned, which waters down the accuracy of your report. Your goal should be to get that column as close to zero as possible.
Reading this report gives you answers to critical business questions at a glance. You can see not just the total revenue for each division, but also the direct costs tied to that revenue. This immediately reveals the true gross profit for each class, showing you which segments are really making you money. You might find that your "Residential" work brings in a lot of cash but has paper-thin margins, while your "Commercial" projects are the real profit engine.
Customizing Reports for Deeper Insights
The standard P&L by Class is fantastic, but you can dig even deeper by customizing it. In the report options, you can filter the data to zero in on specific date ranges, certain customers, or even individual income and expense accounts.
For example, you could filter the report to show only your marketing expenses across all classes. This would instantly tell you how much you're spending to attract "Residential" clients versus "Commercial" clients. This level of detail transforms routine bookkeeping from a chore into a powerful strategic exercise, uncovering hidden opportunities and risks that a standard P&L would never show.
Getting the Most Out of QuickBooks Classes: Best Practices
Using classes in QuickBooks effectively is less about flipping a switch and more about having a solid game plan. When you get it right, you unlock powerful reports that lead to smarter business decisions. But if you’re not careful, you can create a mess that causes more confusion than clarity. The key is to be intentional from the very start.
Think of your class list like the main menu on a website. Too many options, and it becomes a cluttered, useless mess. A clean, simple structure is always better. Before you even think about adding a new class, stop and ask: does this represent a core part of my business that I really need to track for the long haul?
Keep Your Class List Lean and Logical
The whole point of using classes is to gain high-level insight, not to get bogged down tracking every tiny detail. A classic mistake is creating dozens of granular classes. This not only makes daily data entry a slog but also turns your reports into an indecipherable nightmare. For example, instead of creating separate classes for "Residential Project A," "Residential Project B," and so on, it's far better to use a single, broader "Residential" class.
If you need to get into the nitty-gritty of a specific job, QuickBooks has other tools for that, like the Projects feature, which is built for detailed job costing. A lean, effective class list might just include:
- Departments: Sales, Marketing, Administration
- Service Lines: Installation, Repair, Maintenance
- Property Groups: Residential Properties, Commercial Properties
Create an "Admin" or "Overhead" Class
Let's be real—not every single expense fits perfectly into a neat little box. Where do you categorize the bill for the office water cooler? Or your general business liability insurance? These are costs that support the entire company, not just one specific department or service.
This is precisely why having an "Admin" or "Overhead" class is a non-negotiable best practice. By creating a dedicated bucket for these shared expenses, you stop them from being randomly tossed into a revenue-generating class, which would completely skew that segment’s profitability. It also helps keep your "Unclassified" column clean, so it only flags genuine mistakes that need your attention.
Think of the Overhead class as your catch-all for company-wide expenses. This simple step ensures the profitability reports for your main business segments only show the income and direct costs tied to them. The result is a much truer picture of how each part of your business is actually performing.
Consistency is Everything
If you take away just one thing, let it be this: consistency is king. You have to be diligent about applying classes to every single relevant transaction, every single time. This is exactly why enabling the "Warn me when a transaction isn’t assigned a class" feature during setup is so important. It’s your safety net, constantly reminding you to keep your data clean.
That kind of discipline pays off big time. I once worked with a landscaping company that jumped into using classes without a plan. They had a chaotic mix of classes for individual clients, specific job types, and broad service categories. Their reports were totally useless. After a major cleanup, we simplified their structure to just three classes: "Design," "Maintenance," and "Installation."
The clarity was immediate. They could suddenly see that while the big "Design" projects were flashy, it was their steady, high-margin "Maintenance" work that was the real engine of their profitability.
This is the kind of insight that explains why QuickBooks dominates the small business accounting space, holding an incredible 84.27% market share in its category. Powerful features like class tracking, which are exclusive to the Plus and Advanced plans, are a huge reason for its popularity. In 2023, more than 73,000 companies started using QuickBooks, with a huge number of them being businesses earning under $1 million that need exactly this kind of segmented financial data. You can explore more about QuickBooks' market presence and user statistics. By sticking to these best practices, you can make sure your business is getting every bit of value from this game-changing feature.
Frequently Asked Questions About QuickBooks Classes
Even after you get the hang of classes in QuickBooks, some practical questions always pop up during implementation. Let’s tackle the most common points of confusion so you can build your class tracking strategy with confidence.
What Is the Difference Between Classes and Locations?
This is easily the question I hear most often. The simplest way to remember the difference is to think about the physical versus the logical parts of your business.
Locations are built for tracking financials for physically distinct places, like separate retail stores, offices, or warehouses. The key feature here is that QuickBooks can produce a complete, standalone Balance Sheet for each Location.
Classes, on the other hand, are designed for flexibility. They let you track different segments within your company that don’t need their own full balance sheet. This makes them perfect for seeing how different departments (Sales vs. Marketing), service lines (Installation vs. Repair), or even specific projects are performing.
Here’s a simple analogy: Imagine a restaurant chain. The individual restaurant buildings in San Diego and Los Angeles would be your Locations. But inside each restaurant, the "Dine-In," "Takeout," and "Catering" operations would be your Classes. You'd want a full Balance Sheet for each building, but just a Profit & Loss report to compare the profitability of each service.
Both features are available in QuickBooks Online Plus and Advanced, so the choice comes down to your reporting needs. If you need separate balance sheets, use Locations. If you just need to carve up your Profit & Loss statement, Classes are the tool for the job.
Can I Use Classes for Job Costing in Construction?
Yes, you can, and many smaller contractors do just that. Setting up each major job as its own Class lets you track every dollar of income and every expense tied to that project. When the job is done, you can run a "Profit & Loss by Class" report to see exactly how profitable it was.
For more complex construction projects, though, you might find Classes a bit limiting. This is where QuickBooks' dedicated Projects feature (available in QBO Plus and Advanced) really shines. It’s a much better fit for detailed job costing.
The Projects feature gives you a central dashboard for each job that tracks more than just basic profit and loss. You get a single view of:
- All project-specific transactions
- Time tracking and labor costs
- Real-time project profitability
So while Classes work well for broader segments, the Projects feature was purpose-built for the nitty-gritty details that serious job costing demands. A good bookkeeper or tax advisor can help you decide which one makes more sense for your business's complexity.
What Happens if I Forget to Assign a Class to a Transaction?
It happens to everyone, especially when you’re just getting started. When you forget to assign a class, QuickBooks dumps that transaction's income or expense into an "Unclassified" column on your 'Profit and Loss by Class' report.
This can seriously throw off your numbers and make your reports unreliable. A big "Unclassified" total means you have no idea if your classes are actually performing well or if their data is just incomplete.
The best way to avoid this is to turn on the built-in warning. In your settings, find the option to "Warn me when a transaction isn’t assigned a class." This will trigger a pop-up reminder anytime you try to save a form without a class, forcing you to make a choice.
Another great habit is to run your P&L by Class report regularly. It’s a quick quality-control check that helps you spot anything lingering in the "Unclassified" column. From there, you can drill down, find the transactions, and get them assigned to the right place, keeping your data clean.
This flowchart is a great guide for deciding when a new class is truly necessary.
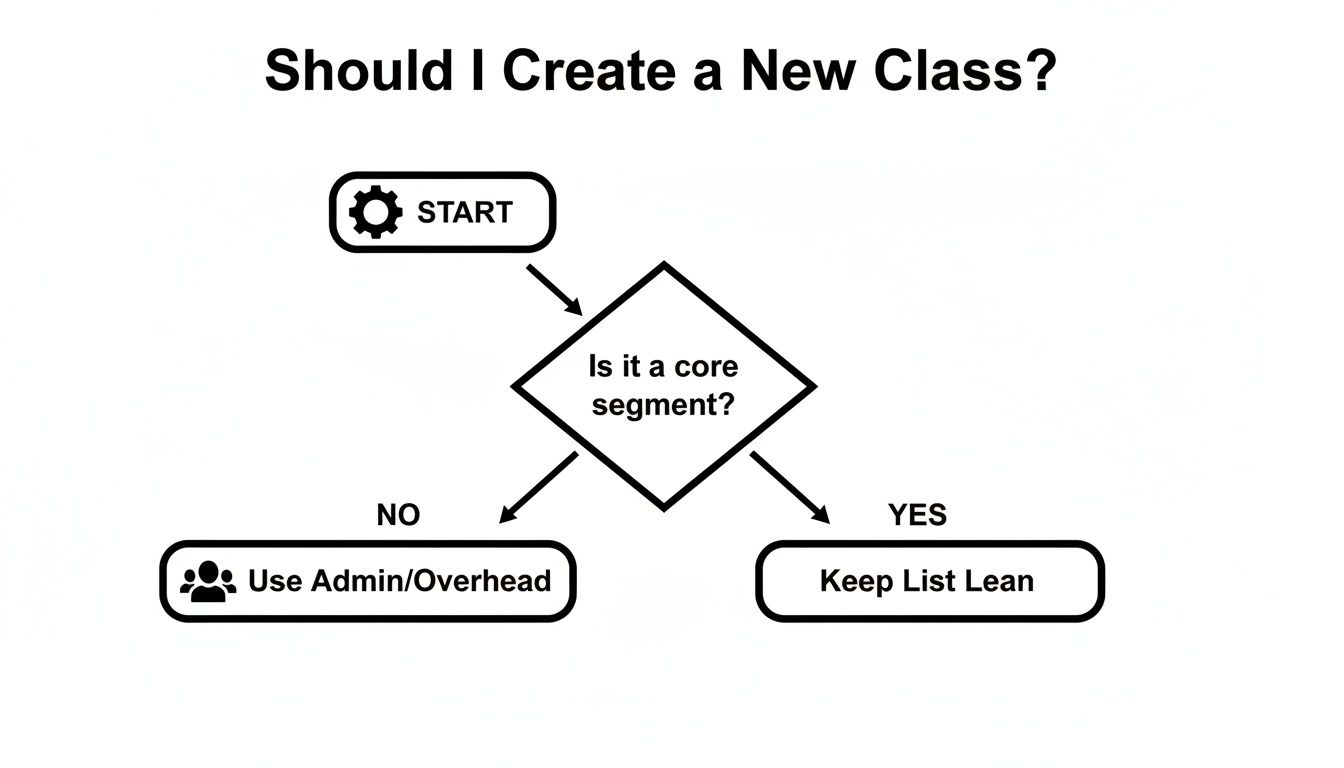
The main idea here is to avoid the temptation to create a class for everything. Keep your list lean and focused only on the most meaningful segments of your business.
How Do QuickBooks Classes Affect My Tax Return?
From a direct standpoint, using classes in QuickBooks doesn't change your tax bill. The IRS taxes your business on its total net income; how you slice and dice that income for your own internal reports doesn't matter to them. Your final liability is calculated from your consolidated totals.
The real benefit comes from the indirect advantages for tax planning and compliance. When you have a clear picture of profitability for each service line, rental property, or business segment, you can make smarter strategic decisions all year long.
For instance, your class reports might show that one service is far more profitable than another. With that knowledge, you can:
- Focus your resources on the high-margin areas to boost overall income.
- Pinpoint underperforming segments where you could cut costs to lower your total taxable income.
- Make smarter decisions about buying or selling assets based on the performance of the class they belong to.
On top of that, if you ever face an IRS audit, having your books neatly organized with class tracking shows a high level of professionalism. It makes it much easier to justify your numbers and provide clear documentation that backs up your tax return.
Properly managing your books with features like class tracking is fundamental to your financial health and tax preparedness. If you need expert guidance on setting up your QuickBooks file or optimizing your tax strategy, the team at Allied Tax Advisors is here to help. Contact us today to ensure your finances are clear, compliant, and working for you.